
Back to help

Workflow builder guide

Turn a repeatable process into controlled work with a clear owner and history.

A workflow definition describes the ordered work. Publishing freezes a version, an assignment decides how that version starts, and each run preserves its own step, recipient and decision history. Use this guide to move from a process idea to a tested live workflow.

Recommended flow

1

Design the outcome

Write down the start event, required steps, owners, expected outcomes and final result before opening the builder.

2

Build and test

Create a private draft, configure steps and routes, then use the built-in simulation to check every outcome.

3

Publish and assign

Publish an immutable version, then choose whether users start it manually, on a schedule or from a record event.

4

Operate and improve

Monitor runs, resolve attention items, edit the working copy and publish a new version without changing active runs.
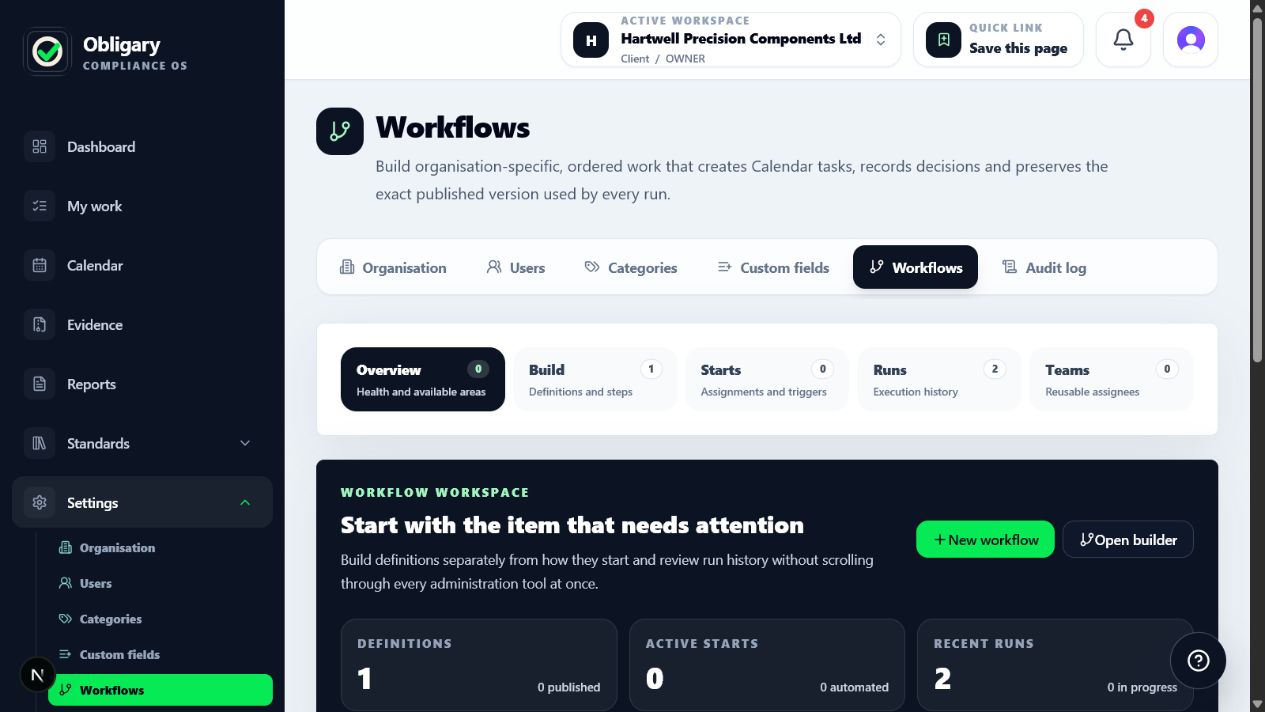
1Chapter 01Orient yourself in the workflow workspaceThe page separates administration into Overview, Build, Starts, Runs and Teams so definitions, activation rules and live work are not mixed together.
Obligary workflow settings Overview showing workspace tabs, workflow health and available areasFull size
Start on Overview to check operational attention, organisation start controls and the areas available to this workspace.
  • Overview: health, paused-start safety control, attention items and enabled workflow areas.
  • Build: private working copies, published versions, ordered steps, routes and simulation.
  • Starts: manual assignments, schedules and record-created or record-status triggers.
  • Runs: active and historic executions using the exact version that was live when they started.
  • Teams: reusable groups for multi-person tasks, approvals and notifications.
2Chapter 02Know the workflow termsThese objects are deliberately separate so process design can change without rewriting history.
  • Definition: the named process and its editable working copy.
  • Published version: an immutable snapshot of the graph. Existing runs never change when a later version is published.
  • Assignment or trigger: the rule connecting the latest published version to a manual target, schedule or record event.
  • Run: one execution for a specific target, schedule occurrence or manual start.
  • Step: an activity within a run. Steps normally progress in order; a decision or outcome route chooses which step becomes ready next.
  • Canvas layout: Start appears at the top, the main route continues downward and decision outcomes sit side by side beneath the decision.
  • Recipient snapshot: the people eligible for a step when it activates, retained even if team membership later changes.
3Chapter 03Design before you buildA short process sketch prevents the editor becoming a collection of unrelated actions.
  1. 1

    Name the business outcome

    Describe the result, such as Supplier approved, Evidence reviewed or Policy published. Avoid naming the workflow after a single intermediate task.

  2. 2

    Choose the dependable start event

    Use manual start for judgement-led work, a schedule for time-led routines, record created for onboarding-style processes, or status changed for lifecycle hand-offs.

  3. 3

    List the minimum required steps

    Include only actions that need assignment, evidence, a decision, a notification or an auditable system change. Keep explanatory sub-tasks in instructions.

  4. 4

    Name the owner for every step

    Decide whether responsibility follows the target owner, workflow starter, previous assignee, a named person, several people or a reusable team.

  5. 5

    Write every expected outcome

    Approval expects Approved or Rejected; a human task expects Completed; an evidence request expects Evidence submitted; document review expects its review outcomes. Add timeout and failure routes where the process needs recovery.

4Chapter 04Create and configure the workflowChoose New workflow, select a guided template or blank draft, then build the working copy from top to bottom in Build.
Obligary workflow Build workspace showing the workflow toolkit and top-to-bottom visual canvasFull size
Use the toolkit on the left to add work and read the route from top to bottom. Select a card to open its properties beside the canvas on a wide screen or immediately below it on a smaller laptop.
  1. 1

    Choose a starting point

    Use a capability-aware template when it resembles your process. Templates only show steps supported by the organisation's enabled areas; choose blank when you need a different route.

  2. 2

    Set the name and description

    Use a name users will recognise in assignments and run history. Explain when the process should be used and what successful completion means.

  3. 3

    Add steps from the workflow toolkit

    The toolkit stays visible in the left rail as you scroll. Select Human task, Approval, Notification, Calendar task, Evidence request, Document review, Record status action or Decision, then choose Add to primary route. New primary-route work is inserted before the completed End state.

  4. 4

    Read and arrange the vertical canvas

    Start is at the top and work continues downward. Decision outcomes are placed side by side beneath the decision before each branch continues vertically. Auto arrange centres and fits this layout; drag individual cards only when you want a manual adjustment.

  5. 5

    Use the properties panel

    Select any card to edit it on the right. Hide properties when you need the full canvas and show it again to continue configuration; collapsing the panel does not discard changes.

  6. 6

    Write action-led instructions

    Tell the recipient exactly what to do, what evidence or decision is expected and where any supporting context can be found.

  7. 7

    Configure ownership and timing

    Choose the assignee strategy, completion mode, due period, reminders, escalation and optional timeout. Use Everyone must complete when each selected person owes a separate response.

  8. 8

    Connect routes

    The primary route continues downward after successful completion. For a decision, use its route controls to add work to the matching side-by-side outcome branch. Add rejection, timeout or failure routes only where they lead to a clear next action or controlled end state.

  9. 9

    Save before publishing

    Save changes to persist the working copy. Saving does not affect live use; publish only after the simulation and user checks are complete.

5Chapter 05Assign people and teams clearlyThe assignment label is based on how the workflow starts and the relationship to the target record.
  • Target owner: the current owner of the record or process activity the run is about.
  • Workflow starter: the person who manually started the run. For scheduled or automatic starts, configure an Automation owner; that person provides the starter context.
  • Previous assignee: the person who completed the preceding human step. Avoid this strategy after an automatic step that has no human assignee.
  • One named workspace member: always routes to a selected active member.
  • Several named workspace members or Workflow team: routes to a group. Choose Any one when one person may claim the work, or Everyone when every recipient must complete their part.
  • Notification steps support the same recipient strategies and can send an in-app message, email or both.
6Chapter 06Build decisions from real outcomesDecision choices should reflect the previous step, so administrators do not have to invent technical values.
  • After Approval, route from Approved or Rejected.
  • After a Human task or created Calendar task, route from Completed.
  • After an Evidence request, route from Evidence submitted, declined, expired or timed out where configured.
  • After Document review, route from the review outcome such as approved or changes requested.
  • Use a Custom field decision when the route depends on typed organisation data. Only fields scoped to available record areas are offered.
  • Use the route preview before publishing to confirm where each outcome, timeout and failure path will go.
7Chapter 07Test every route before publishingThe simulation checks graph shape and lets you walk expected outcomes without creating live tasks, emails or records.
  1. 1

    Validate the draft

    Resolve missing titles, recipients, targets, routes or unavailable capabilities. A workflow should not depend on a disabled add-on.

  2. 2

    Run the primary success path

    Start at the first action, choose the normal completion outcome and confirm the route reaches Completed in the expected order.

  3. 3

    Run every alternate decision

    Test rejection, changes requested, missing evidence and every custom-field branch. Confirm each leads to useful work rather than a dead end.

  4. 4

    Run timeout and failure paths

    Check that overdue or failed external work reaches an administrator, retry, recovery step or controlled end state.

  5. 5

    Review wording as the recipient

    Read each title, instruction and notification without relying on builder context. The assigned user should know the required action and outcome.
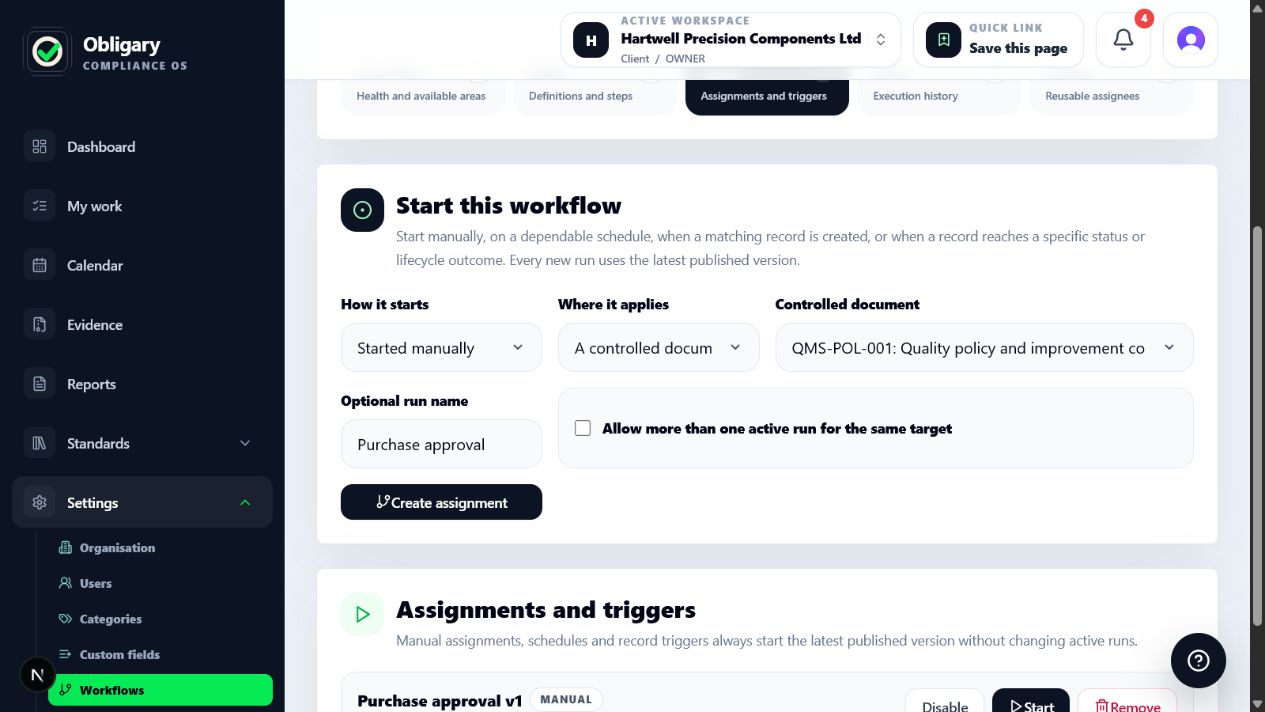
8Chapter 08Publish and choose how it startsPublishing creates the version; it does not start work by itself. Configure Starts separately after version 1 is live.
Obligary workflow Starts workspace showing assignment trigger setup and existing workflow startsFull size
The Starts area separates activation rules from the definition and shows automation ownership, schedule timing and run controls.
  1. 1

    Publish the reviewed working copy

    Open the publish summary, check the version number and route overview, then confirm. A later edit remains private until a new version is published.

  2. 2

    Choose how it starts

    Manual creates a Start button; Scheduled uses a timezone-aware recurrence; Record created starts for every matching new record; Status changed starts only on a real transition to the selected status.

  3. 3

    Choose the target

    Select the record type, specific record or process activity the run is about. Only enabled plugin and add-on areas appear in new setup.

  4. 4

    Set the automation owner

    Scheduled and event-driven starts have no person clicking Start. The Automation owner supplies accountability and workflow-starter context for those runs.

  5. 5

    Set parallel-run behaviour

    Keep one active run per target for ordinary controlled processes. Allow parallel runs only when overlapping occurrences are intentional and recipients can distinguish them.

  6. 6

    Create and perform a pilot start

    Use a safe test target and a small recipient group. Confirm the first step, due date, notifications and run history before enabling broad automatic use.

9Chapter 09Operate live workflowsOverview and Runs are the administrator's daily control points. Assigned users complete their work from the run page or linked task area.
  • Review Workflow operations for missing assignees, failed actions, overdue steps and work due soon.
  • Use Check waiting runs to reconcile evidence requests and document reviews when an external callback may have been missed.
  • Open a run to see the active step, recipients, immutable history and the route that will follow the current outcome.
  • Use the recovery console to replace an unavailable assignee, reissue or restart external work, retry an action, or apply a reasoned override with full audit history.
  • Pause new starts during maintenance or incident investigation. Active runs, editing and publishing continue while starts are paused.
10Chapter 10Change a live workflow safelyEditing a published definition creates working-copy changes; it never rewrites an active or completed run.
  • Save the working copy frequently. The editor badge shows unsaved changes and saved updates not yet published.
  • Repeat the full simulation when recipients, completion modes, decisions, record actions or plugin-dependent steps change.
  • Publish a new version only when new starts should adopt it. Existing runs remain on their original version.
  • Disable or remove an assignment to stop that start route while retaining existing run history.
  • Delete a definition when administrators no longer need it in the active library. Deletion disables its starts and hides the definition while retaining published versions and run history for audit.
11Chapter 11End-to-end acceptance checklistUse this checklist with representative users before treating a workflow as production-ready.
  • Owner/Admin: create, save, simulate and publish the workflow.
  • Administrator: configure each intended start route and confirm unavailable plugins are absent.
  • Recipient: receive the assignment or notification, understand the instructions and complete the expected outcome.
  • Decision route: verify every success, rejection, timeout and failure branch reaches the expected next step.
  • Multi-person work: verify Any one and Everyone completion modes with the intended recipient group.
  • Operations: confirm overdue, missing-assignee and failed-action diagnostics appear and can be recovered with an audit reason.
  • Versioning: publish an amended version and confirm an existing run remains on the earlier version while a new run uses the latest one.

Related guides

Important boundary

Obligary supports organisation and evidence. It does not replace professional judgement.

Use Obligary to manage tasks, owners, reminders, documents, evidence and reports. Your organisation remains responsible for deciding what applies and taking legal, regulatory or certification advice where needed.